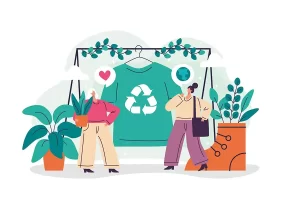
Home » Skin Care » Face Care » Facial


Facial


Beautytipshub provides you with a complete step by step guide on home facials. Do you want a glowing skin that will transform you into a glamorous diva? Professional spa treatments are expensive. So, it cannot be availed of by many. Well, there is nothing disheartening about it. You can indulge in a rejuvenating skin facial at home, by following our expert guide on home facials.

Regular facials keep your skin healthy, ex foliates the skin, prevents wrinkles, lightens the skin tone and tightens the facial skin, thereby preventing sagging of facial skin. It also hydrates the skin and helps to remove blemishes, dark circles, acne and pimples.

Things Needed for Home Facials

Ideally, you should do a facial once a month. You will need:
  • A moisturizing lotion
  • Face masks according to your skin type
  • Cleansing lotions
  • Skin tonic
  • Towels
  • Ex foliating scrub
  • Face cream
  • Cotton balls
  • A bowl of hot, steaming water (optional)
  • Hot steam can be left out if you have too many open pores and boils on your face.
Beginning at the Basics – The Six Magic Steps to Great Skin

Now let’s discuss about how to get started with your home facial.
  • Cleanse: The first step is to cleanse your skin with a gentle cleansing lotion. Apply the lotion in a circular motion on your face and throat, extending up to your hairline. Gently massage the lotion into the skin and cleanse with cotton buds. Dry your skin with a facecloth.

  • Ex foliate: Next, scrub your face gently with a grain based facial scrub. Oatmeal or apricot works best. Pay attention to the forehead area and to the area surrounding the nose. If you have combination skin, concentrate on the oily areas. Finally, rinse the face with lukewarm water.

  • Steam: Steaming your face is necessary for improved blood circulation, for removing toxins, opening follicles and for softening the skin. Take a large bowl and fill it with boiling water. Drop mint, calendula or lavender for dry skin or witch hazel, mint, rose or lavender for oily skin. Chamomile, comfrey or calendula is ideal for sensitive skin. Now lean your face over the bowl an cover your head with a towel. Hold your face at least 15 to 24 inches away from the water. If you have open pores or sensitive skin, then you should keep your face further away from the water. Hold the face above the bowl for at least five minutes.

  • Face Masks: Then apply a home made mask on your face. Masks remove oil and impurities from deep within the skin. Remember a clay based pack is good for oily skin. You should choose a cream or gel mask for dry skin. Do not apply the mask around the eye portion. Face mask recipes are discussed in detail below. After application of the mask, place cotton buds over the eyes and leave on the mask for 10 to 15 minutes.

  • Toning: Toning is good for removing dead cells from your skin as well as mask residue. Aloe vera an witch hazel are the favorites. Apply the toner in gentle upward strokes.

  • Moisturizing: Apply a moisturizing lotion that suits your skin type. Do not exclude the eye area. Rosehip seed oil and shea butter are good options. Do not use any lotions that contain mineral oil. Massage your face with the cream.

Home Facial


You can easily make some facial masks with your kitchen ingredients. They are easy to make and prove to be very effective on skin. Followings are some facial recipes. Try it out.

Almond Facial Mask


To prepare mask you need four to five almonds, honey of one table spoon and one egg. Grind the almonds and make a thick paste with other ingredients. Now after washing the face with a mild soap, apply this paste to your face. Leave it for twenty minutes. Now wipe it with a wet cloth.

Honey Curd Facial Mask


Take two tablespoon of honey, one tablespoon lemon juice and two tablespoon curd. Make a paste with all ingredients and apply to the face. Leave it for thirty minutes. Wipe out with a damp cloth.

Remember one thing that before starting any facial process wash your face with an herbal body wash and then clean properly it with a cleanser.

Sandalwood Facial Mask


To make a sandalwood mask, take two tablespoon of sandalwood powder and make a smooth and thick paste with rose water. Apply on the face. Leave it until dries. Now wipe with a wet cloth.

Facial Massages


Facial massages have a great influence on skins rejuvenation. You should have a facial massage everyday before going to bed. The process is simple yet very effective. First, you have to choose massage oil according to your skin type. Persons having oily skin should use peach crenel oil or hazelnut oil where as people of dry skin must use wheat germ oil or apricot oil. Sunflower and olive oil go well with normal skin.

Procedure
  1. Take one teaspoon oil in to your one hand and rub it with both hands.

  2. Now gently apply to your whole face and neck with upward and downward strokes. Strongly slither on your jaw line. Don’t place your hands close to your eyes. Massage the surroundings gently. Do this movement for a few seconds.

  3. Now wipe your face with a damp piece of cloth.

Facial Yoga and Exercises


Facial yogas also help reducing many face related problems and make your face more beautiful and charming. Of all yoga facials, ‘Lion’ is the most popular and effective. Besides that an over all workout will help you removing many problems.

Facial Peels


People are now going for facial peel treatments to make their skin free from blemishes, spots and freckles. It is a chemical treatment and should only be done by the professional dermatologists. The treatments are very effective if done by any expert hand. Also various peel creams are available in the market for removing extra spots and blemishes; however one should go for a reputed brand and the proper application should also be known. So, pamper your skin with a facial and discover the new 'you'.

Note: Some of the above mentioned ingredients might prove to be allergic on different skin types. If you experience any irritation or inflammation please discontinue the usage.


blog comments powered by Disqus